Vyond is a cloud-based animated video creation platform. It is easy to use due to its user-friendly interface and functions. It is versatile and animations are easy to create even for someone who has no prior technical knowledge of design or animation. Vyond has built-in thousands of props, assets, and characters using which we can create and animate almost any scenario.
Vyond animations gives eLearning courses a constructive look and feel. Animations create better engagement for learners and gives them a clear and visual understanding of learning content. Vyond animations adds a new dynamic to eLearning courses with its easy to create animations and videos.
Start by creating a trial account:
If you have not used Vyond before, then it’s better to first create a trial account and get a feel of how animation process works. Creating a trial account first and practicing will help us get to the level which we need to create professional animations for our projects.
Setting up a new video:
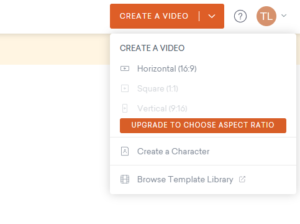
Choose “CREATE A VIDEO” on the top right of Vyond web app. For the demo account we have one option to create a horizontal 16:9 ratio video.

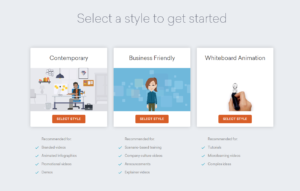
After selecting we get the option to choose three different styles of animations. Each style has its own characteristics and uses and we can select a style regarding what requirements we have.
For example, we can choose Contemporary style for Branded videos, Animation infographics, promotional videos and demos. Business Friendly style is recommended for scenario-based training, company culture videos, announcements and explainer videos. The last whiteboard animation style is recommended for tutorials, microlearning videos and complex ideas.

Dos and Don’ts of video creation in Vyond:
Before starting video creation in Vyond, we should keep the whole process in mind. That includes having:
- Concept
- Strategy
- Storyboard
- Style
Each part is important to complete before creating the animation.
Start creating:

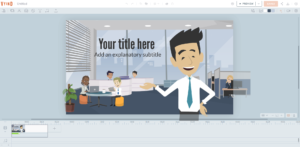
Now you see the Vyond Studio. It’s easy to learn and everyone has their own pace of learning. A Quick easy tour navigates you through each of the necessary features to start your video animation.
We can start creating by scratch or choose ready-made templates. Vyond has hundreds of scenes, characters and props to choose from. These are all available on the top left of the screen.
A preview pane is visible at the center of the screen which shows exactly what we are creating. On the top right we have scene editing, transition and settings options which we will explain below. On the bottom there is a timeline which can be used to control timing of animating objects and the animation itself.
Let’s say you want to create a video explaining SOPs related to patient medical records for a hospital. It will be a scenario-based video with characters and multiple scenes. So, we can opt for the recommended Business Friendly style of animation.
Vyond adds a custom scene which we can delete and then choose a scene which looks like a doctor’s office. In the search bar, search for “hospital” or “office” and add the scene which suits the scenario.

Next, you can add props and characters to your scene. Vyond has a large library of props, characters and music to add to your video. You also have the option to upload your own characters and media. We can choose between three types of characters i.e., Business friendly, Whiteboard animation or contemporary. We will use business friendly characters in this video.
Animating a character:
On the top right of the Vyond studio, you can see a couple of buttons, three of which are Action, Expression and Dialog. These are used to animate characters.

Choose the right expression and animation and apply to the selected character. You can copy and paste a scene multiple times and change animation of a character in each scene to create seamless animation.
Preview your animation:
After creating one or multiple scenes, it’s better to preview and get an overview of how your animation looks. Tweak the animation according to your script and review the changes again until your animation is ready for final output. Preview button is on top right of Vyond studio. You can choose to preview the full animation from start, or choose to preview the scene you have currently selected.
Overview of Vyond:
The best thing about Vyond is that you do not need prior experience or too much knowledge of animations to start creating videos in Vyond. It works like a basic video editing tool which doesn’t need much technical know-how to use, but it gives you all the necessary features to create an animation and it has some advanced features like Visual search feature, background remove feature within Vyond to help you create seamlessly.


